The penguin's motorcycling and Jeep blog

Monday, April 11, 2011

Removing "wheel locks"

Do you have some of those "wheel locks" on your wheels that have a serrated set of teeth on the outside that a "key" fits over to allow you to remove the wheel? Guess what: Those things are nothing but a waste of time. They certainly won't stop anybody from removing the wheel if they have access to tools. I know, because I just did it.

So I go to rotate my tires, head into the console to get the wheel key, and... err... no key. And no idea where it went. I cleaned the car out so I know it's nowhere on the floor of the car, but it's not in the glove compartment, console, nor in the coin cup, the map pocket, or the door pockets.

What next? Well... I tried getting a pipe wrench over one of the "locks". Nope, my offset's wrong for that. So next I tried hammering a 16mm socket onto the head of one of these things. It went on okay, but didn't bite deep enough and stripped out. So next thing I did was hammer a 5/8" socket onto the head of one of these things and... success. Removed it like it was intended to come off that way. Getting the 5/8" socket off the "wheel lock" took a large bench vise and two large prybars, but if I were intent on stealing the wheels I would have just brought a handful of 5/8" sockets with me... not that anybody is going to steal rusty steel wheels in a size that fits almost no vehicles anyhow, sheesh!

So anyhow, now I've replaced these so-called "wheel locks" with lug nuts from my stash of random junk (what, you don't have a stock of random stuff like lug nuts, tie rod ends, and so forth? Sheesh, next thing you tell me is that you don't even have a torque wrench!). So I'm good to go tomorrow on rotating my tires. But sheesh, what a PITA.

-- Badtux the Wrenchin' Penguin

Sunday, April 3, 2011

50,000 miles and five years

The TuxJeep now has 50,000 miles on it and is five years old. It seems like yesterday that the silver demon forced me to bring it home, but no, it's been five years. So I'm starting to change out all the fluids, just on general principle. First up was engine oil, which had about 6,000 miles on it (max 7500 mile change interval on this engine). This weekend I swapped out two gallons of coolant for two gallons of 50/50 Zerex G-05 HOAT and distilled water, just to start the process of refreshing its anti-corrosion properties.

Now, a note about anti-freeze. There's basically three kinds of antifreeze out there. The first kind is the old-fashioned green shit that has to be changed every year and which causes deposits in your radiator if you mix it with anything other than distilled water. This is what's available at your local Wal-mart. The second kind is the GM OAT (Organic Acid Technology) coolant, which is dyed orange, which has a bad tendency to eat pot metal parts of your engine such as the thermostat housing. This is *also* available at your local Wal-mart. The third type is a hybrid, HOAT, which has silicates to protect pot metal but also has the long-lasting organic acids to combat corrosion of the other metals in your engine. Ford and Chrysler have settled on this one for their new cars, both use Zerex G-05 HOAT coolant, dyed yellow for Ford (and for the aftermarket), pink for Chrysler. (Yes, *PINK* -- there are sources on the web that say that Chrysler's HOAT is dyed orange like GM's OAT, but the factory fill in my Jeep was quite blaringly PINK). Unfortunately only professional auto parts places like NAPA and Carquest, or dealerships, carry the HOAT coolant -- unlike the OAT or the green shit, you can't get it at Wally World or Auto Drone. And it's *expensive*, $15/gallon at NAPA...

So why is this important? Well, first of all, don't put the orange shit into your car unless that's what your car came with. OAT works by allowing the metals to corrode, then bonding with the corrosion to form a film. Thing is, some metals don't corrode with the correct chemistry for OAT to bond with to create the anti-corrosion film, and you end up with Bad Things Happening. So only cars designed for OAT (i.e. with the correct metal alloys exposed to its cooling system) should get OAT. But if your car came with OAT, you should stick with OAT for one good reason: all other chemistries will, over the long term, clog up your radiator and cooling system with silicate deposits. Only OAT is guaranteed to never do that, for the simple reason that it has no silicates.

Secondly: For everything else, HOAT is the correct thing to use. I've talked to people who restore old cars. To a man they recommend HOAT for *everything*, because it stops corrosion without unduly clogging up your cooling system and is safe for *all* metals, not just the ones that OAT chemistry was designed to bond with. Which is why any shop worth its salt should have only two coolant types in its quiver: the GM Dex-Cool OAT (orange), and the Zerex G-05 HOAT (yellow). The green shit should be consigned to history along with leaded gas and carburetors, it just doesn't work as well as the new stuff. Yet the green stuff is still the most common coolant even shops put into cars... despite the fact that it's crap. But it's cheap. Which is all that counts when someone cares more about profit than about their car's lifespan.

So anyhow I scored some Zerex G-05 (yellow) for about $5 a gallon less than the pink-dyed MOPAR HOAT at the Chrysler dealership (pink), so now have kind of pinkish-yellow coolant in my Jeep (since the cooling system holds a total of about 2.65 gallons and I put a little less than 2 gallons of coolant into it, the rest was in the heater core and other places in the cooling system). Note that the G-05 *IS* the MOPAR coolant, Zerex simply dyes it pink rather than yellow. It seems that pink is a stronger color than yellow, so 3/4th gallon of pink makes 2 gallons of yellow pinker than you'd think. Curious, eh? So anyhow, mixing G-05 with G-05 should be fine, I just refreshed the anticorrosion package with my infusion. Since I only changed out around 2/3rds of the coolant with the radiator and reservoir change, I'll go ahead and do it again in around three years, since I put around three years worth of anticorrosion additives in there with the new coolant.

Next thing I did was change the front differential fluid. I had two quarts of Royal Purple 75W140 left over from my last differential fluid change, and used that. What I discovered inside the differential was that the old Royal Purple fill had sludged up a little since my last change of the front differential fluid, at 20,000 miles. So this is the last time I'm filling with the Royal Purple, the next fill is going to be the Mobile 1 75W140 synthetic. I've already purchased the Mobile 1 plus the limited slip additive for the rear differential and will be changing that out shortly.

Some other fluids that can be changed:

  1. Brake fluid -- probably the most important one to change. Chrysler uses low-spec DOT 3 brake fluid. Going to DOT 3/4 should get me better specs as well as get rid of any moisture that's accumulated in the system over the past five years. I have a Mitey-vac vacuum pump somewhere, I need to find it (haven't used it since I moved to the "new" place eight months ago)...
  2. Transmission fluid -- this uses Synchromesh fluid. Chrysler doesn't even have a fill spec on this, it's supposedly a "lifetime" fluid. Probably going to leave this alone for now, and change it at 90,000 miles just on general principles.
  3. Transfer case fluid -- this uses ATF+4 automatic transmission fluid, which is good stuff (much better than the old GM Dexron III from days of yore). It's spec'ed to be changed at 80,000 miles. Won't hurt to change it anytime between now and then.
  4. Power steering fluid -- this, alas, got changed last year when the moron ran the red light and broke my steering box with the side of his car. So I'm fine there.
So anyhow, that's pretty much all she wrote for now. I'll change out the rear diff fluid sometime in the next few weeks, find my pump and turkey baster and suck the old fluid out of the reservoir, replace it with fresh, and then bleed the brakes to suck the old DOT3 out and put the better DOT3/4 fluid in, and then I'm pretty much done maintenance-wise for the moment.

Oh, while I was at it I put some new light bulbs into my lights. But I'm not telling you what they are, because they're a bit, err, not DOT-certified. But at least I'll be able to see at night!

-- Badtux the Blindingly Bright Penguin

Friday, December 24, 2010

Motor mount woes

First, let's review what a motor mount does in a Jeep. The job of the motor mount is to a) isolate the engine from the frame so you don't get your teeth vibrated out, and b) hold the engine on top of the frame. There are two motor mounts, one on each side of the engine about 2/3rds of the way towards the front, then the back of the engine is held up by the transmission. The transmission then has a rubber mount at the back of it that holds it to the cross member / belly skid plate that runs across the belly of the Jeep. So there's three pieces of rubber holding the whole engine / transmission / transfer case assembly off the ground, and three points determine a plane so these three pieces of rubber determine the location of the whole assembly.

Here is what the motor mount looks like on my Jeep:

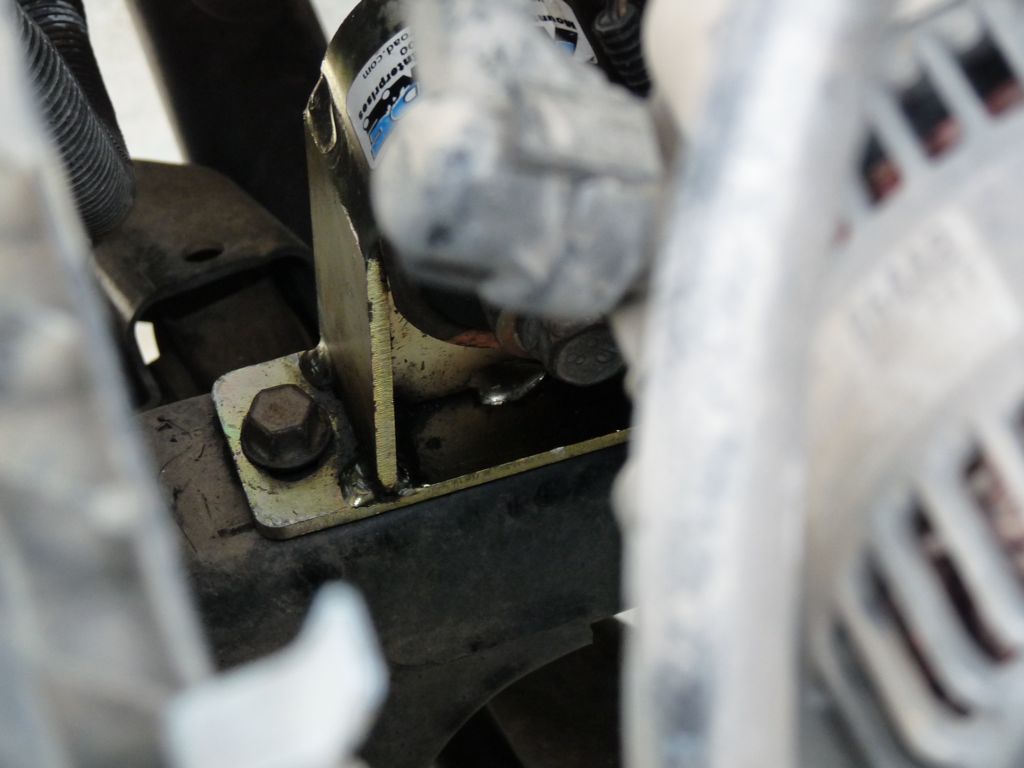
There is a bracket welded to the frame that this mounts to. The part of the bracket closest to the outside of the Jeep has a nut welded into it and you go down from the top through that small hole in the motor mount. On the part of the bracket closest to the Jeep, there's just a hole. A stud comes down from the motor mount that must be pushed through that hole, and then you put a nut on the stud from the bottom. You can't come in from the top because the stud is below that big rubber bushing you see. Then the engine has a forked bracket that comes on either side of that big rubber bushing, and a crossbolt goes through the forked backet and through the big bushing in the middle of the big rubber bushing, and that's what holds the engine up off the frame, nicely isolated by a big rubber donut all around. Here is what it looks like installed in the Jeep (sorry I didn't get a better picture): So anyhow, it's been raining here in the Silly Cone Valley for 40 days and 40 nights, well, feels like it. I decided to take a trip in my Jeep for Christmas. Before taking any trip, I inspect my Jeep to make sure all the fluids are okay, all the bolts are nice and tight, none of the u-joints or tie rods or anything waggle when I whack'em with a rubber mallet, and so forth. And so things were going along fine until I got to the passenger side motor mount on the underside, looked up to where there's supposed to be a stud and a nut holding the engine side of the mount down, and... err. Yeppers, the blasted stud snapped right off at some point in the recent past!

That's from right after I pulled it. To pull it, you first remove the nut from the stud. Well, if there's a stud :). Then you remove the bolt. Then you put your floor jack and a piece of 2x6 under the oil pan skid plate and jack up the engine until the mount is just barely above the frame. Then you remove the crossbolt and the motor mount slides right out.

So anyhow, thanks to Christmas I can't get a new motormount until January (because all the suppliers are on holiday). So I rednecked a temporary fix: I drilled out the remnants of the stud, and jammed a nut on top of it, grinding out just enough so I could tap in the nut with a drift to retain it. This is a flange nut, which has a serrated bottom, so once there's pressure on it from a bolt pulling it towards the frame, it's not going anywhere. But there has to be enough friction to allow it to get pressure on it. Thus why I had to barely grind out enough to be able to force it in there with the drift and 3-pound hammer:

Once I did this, I then had to properly space out a bolt so that it wouldn't bottom out on that bracket part that's above the nut, yet would grab enough threads to not strip out. That required trial and error with various washers and nuts lying around. But I found the right combination, and now it's all installed again, waiting for a new mount but quite usable in the meantime.

As for why the stud broke: It was a metric grade 8.8 bolt welded to the motor mount before the top part of the motor mount was fabricated. Metric grade 8.8 (not to be confused with SAE grade 8, which is the equivalent of metric 10.9) is barely above compressed oatmeal on the hardness scale, but normally won't break in this application. It does bend fairly easily if not fully retained by a torqued nut, however, and also stretches fairly easily if overtorqued or given a sudden shock in the longitudinal direction. What I'm suspecting is that the bolt stretched, perhaps from the oil pan skid plate getting whacked by a rock, letting the motor mount jump around bending the stud back and forth until it work-hardened and finally snapped off. I didn't catch it because I was testing the nut by putting a wrench on it and seeing if it would move, and of course it was corroded in place and wouldn't move -- and unfortunately the place it was corroded into did not put enough pressure on the now-stretched stud to keep the motor mount from moving around.

All of this is compounded by the fact that I can't get a torque wrench onto most of these bolts due to lack of access -- all my torque wrenches are too big to fit into these cramped quarters and it's problematic running long extensions thru u-joints and expecting to get the right torque reading on a tork wrench -- so I'm just hoping that I'm putting the right torque on them. It may be that I had already put close to too much torque on the bottom, and whacking my belly pan on a rock was just enough to finish it off.

So anyhow, needless to say I'm not happy here, I think they should have gone with at least a metric 10.9 grade bolt for the stud because they don't stretch as easily, but at least I'm on the road again. And that ends today's adventure in Jeep wrenchin'...

-- Badtux the Wrenchin' Penguin

Sunday, December 5, 2010

Wow, this place has gotten musty...

The latest mod to my Jeep is the Savvy Offroad rocker guards, which are heavy aluminum plate with stainless steel skids. So I took'em out to Death Valley to test'em out in Mengel Pass's rock garden. Naw, dadburned rock garden has gotten as well groomed as Justin Bieber's hair. Still, there was a few mildly interesting spots, and I video'ed them with my new iPhone 4...

I'm being followed by a full-sized F-150 4x4 pickup truck, which is big and wide. I have to wait on him a bit from time to time -- like Marines, we 4x4 types don't leave folks behind.

So now you know what it looks like when I'm out there in the desert...

-- Badtux the Jeepin' Penguin

Sunday, March 21, 2010

The Six Million err Thousand Dollar Jeep

"We have the technology, we can rebuild her."

As readers of my blog know, someone ran a red light in front of me and I t-boned him a couple of weeks ago. The right front corner of my Jeep was a mess and the steering box Pitman shaft sheared right off. But never fear, the Silver Demon is back on the road again:

Because the bumper was toast, I bought a cool Warn bumper. It cost the same amount as the OEM bumper but is much stouter. The fender is a new replacement, but rather than the OEM fender flare I bought some Bushwacker flat fender flares to replace the OEM's, this gives me more clearance under the fender for bigger tires and also some trick side running lights (DOT certified so they're street legal, don't worry). The fog light on that side was toast, so I bought some Hella 500 fog lights rather than an OEM replacement light, they actually use the same reflectors so that wasn't a big deal. I had my mechanic do most of this work because a body shop would have been utterly clueless.

I brought her home Thursday evening, and have spent most of this weekend going over her making sure everything's okay. I swapped out the lower control arms with some new JKS control arms and checked the OEM's to see if the impact had caused damage to the bushings, no, it hadn't. Doesn't appear to have hurt anything else either, the Jeep drives the same as it did before it got whacked. Jeeps are *tough*. Well, except for that OEM steering box, but I'm wondering if that fault line might not have been there on purpose so that if the wheel ever got a whack like that, it wouldn't cause the steering wheel to spin and break my fingers.

The shop mostly did things okay, but two things were wrong -- the wiring for the marker lights was reversed (so it would not blink when the lights were on), and the right marker light was hard-wired rather than having connectors (because the original wiring had been sheered off by the fender when it was crumpled). Easy fix for both. And the alignment shop did not center the steering wheel, grrr, but that was an easy fix too, just grab the spinner near the pitman arm and spin away (it doesn't affect alignment, just the centering of the steering wheel)... took me two tries, the first time was a little too far, the second try was successful, the only way to know whether it's okay is to drive it down the center of a straight road (so the crown doesn't make it want to go one way or another) and see whether the steering is straight, clearly the alignment shop didn't do that. Oh well!

Now to put the new (well, used, bought from someone else) Old Man Emu front springs on her to deal with the sagging front springs... I was going to do that today, but discovered that the new (well, used, being thrown away by work) workbench I'd put in my garage was too big and didn't give me enough room to jack the front of the Jeep up. I remedied that by shifting everything around to put the workbench in the corner, where it's now out of the way... but that ate up a bunch of my time, I have too much junk in my garage (for a definition of "junk" that is "tools and supplies"). And of course once I do that, I'll need to align the Jeep *again* and re-center the steering wheel *again*. Meaning I wasted my time centering it the first time, but what the hey, ain't the first time I've wasted my time ;).

-- Badtux the Wrenchin' Penguin

Monday, March 8, 2010

Toyota is the new Philip-Morris

Philip-Morris, you might recall, is the cigarette company that for years insisted up and down that cigarettes were good to you... all the while knowing, within their labs, that they were addictive and caused cancer. They became the poster child for companies that care more about profits than about the health and safety of their customers, so hated that they had to change their name to "Altria" (I guess if you can't X it out, effin' A it out) to escape their reputation.

So why bring up Toyota and Philip-Morris in the same breath? Well... it's because of the testimony of David Gilbert, an automotive technology professor who demonstrates a fault condition that Toyota's electronic throttle control software doesn't detect. Note that Mr. Gilbert does not say -- or prove -- that this particular error condition is the cause of Toyota's problem. Rather, he shows that there is a condition that Toyota's throttle control should detect -- two shorted wires to the throttle position sensors, which are supposed to have different voltages on them because they go to different resistor packs -- which it does not, in fact, detect, and therefore there is at least one bug in Toyota's throttle control software. And software bugs are like cockroaches -- if you can see one wandering around on your kitchen counter in broad daylight, likely enough there's a thousand more in the wall behind the counter hidden from view.

Toyota can try to spin this all they want, but as someone who has an EE+software engineering background, I agree with Gilbert that this seems to indicate that Toyota's throttle control software is not as robust as they claimed and thus cannot be eliminated as a possible cause of the problem. So what's Toyota's response? A) say that Gilbert was paid by trial lawyers (true, but so what? The software problem doesn't go away just because of who Gilbert is paid by), and B), to hold a dog and pony show claiming that Gilbert's *SPECIFIC* bug is not the cause of the acceleration problem. Uhm, okay, but Gilbert himself did not say his bug was *THE* cause, just that it indicated a problem with the software.

All Toyota is accomplishing is making themselves look like the cigarette companies -- i.e., a bunch of lying bastards more concerned about the bottom line than about the health and safety of their customers. This points to a problem in the Japanese psyche that has been sort of shoveled under the covers since WWII -- the Japanese unwillingness to ever admit that they made a mistake or are not perfect. The Japanese refused to believe that their codes had been broken for years after Pearl Harbor, allowing the U.S. to know exactly what they were doing at all times, and even when things happened that should have just blatantly told them "our codes are broken" (like American carriers appearing off of Midway Island *just in time* to sink their own carriers) they refused to believe that any mere American could ever do such a thing to their "perfect" codes. I'm seeing the same mentality at work on the part of Toyota right now... and it ain't pretty, ain't pretty at all.

-- Badtux the Car Penguin

Sunday, March 7, 2010

Gimme heat!

I'm not sure when the low speed on my Jeep's heater quit working, but I noticed it one day while driving down the street -- no hot air blowing out of my vents. WTF? I checked the next three speeds up, and they all worked. So it wasn't the motor, and given that my Jeep has less than 40,000 miles on it, it didn't seem likely to be the switch. At that point, it clicked: Heater resistor.

To understand what I'm talking about, here's the deal. Your heater blower motor takes 12 volts. The way pretty much all American cars are wired, it takes that 12 volts straight from the fuse box, through a relay controlled by the "Hi" setting on the air conditioner/heater fan control. If you want the motor to run slower, you have to feed it less voltage. The way that American cars do that is to have a resistor network, where each resistor gives you a progressively lower voltage, and use the heater control switch to switch which pin of the resistor network gets sent to the blower motor. The higher the resistance, the lower the voltage, and the lower the fan.

Checking out my handy dandy factory service manual, I decided to pull the resistor out and test it. The problem was, where is the blasted thing? Finally after sufficient digging around I found where it is: mounted right above the passenger side footwell light. So I unbolted the light and unplugged it and put it aside, unplugged a bunch of wires under there and moved them aside, and there we were, two 8mm bolts holding this thing in so that it sticks into the airflow where it can get cooled down while the heater is operating. So I removed it and it turns out to be a flat circuit board with resistive traces on it. I take my ohm meter, and yeppers, the connection between the last two pins (the smallest one is the low speed pin) is gone, and a glance at the circuit board shows that the trace apparently exploded where the connector's pin attaches to it, probably due to a manufacturing defect that allowed moisture to get into the circuit board.

A quick trip to my local Jeep dealer and $25 later, and I have a new resistor, and have all fan speeds going again. And yeah, this was probably caused by a manufacturing defect of this Hecho en Mexico hunk of junk, but my OEM warranty ran out at 36,000 miles, so fat chance of getting reimbursed. WTF, it's just $25. So anyhow, if you ever run into this with your own car, it might be as simple as that: a $25 resistor panel might be blown. It's a cheap and easy first thing to check anyhow, and it's not as if they're (usually) expensive...

-- Badtux the Now-Warm Penguin